How to Update a Provisioning Server vDisk

Procedure: how to update a provisioning server vdisk

Time to apply some updates!

To create a new version:

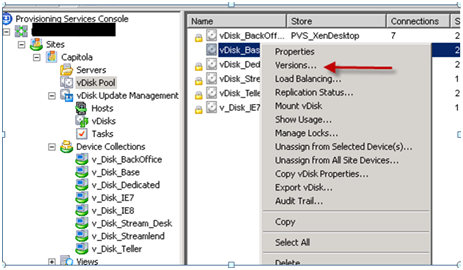
  1. In the Provisioning Server Console, right-click on a vDisk to version within a device collection or vDisk pool, then select Versions… from the context menu. The vDisk Versions dialog appears.

    Note: Verify that the vDisk is currently not in Private Image mode.
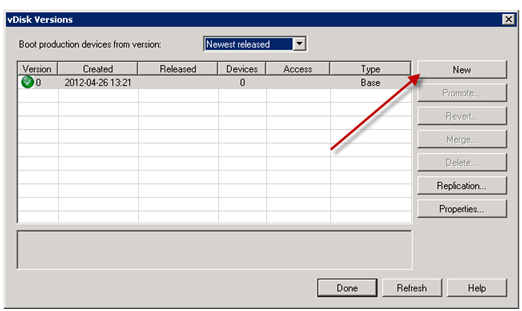
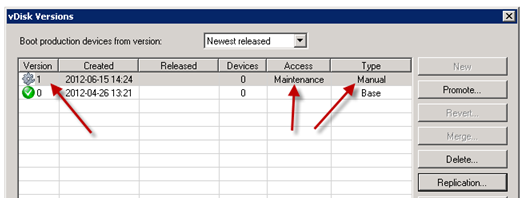
  1. Click New. The new version displays in the dialog with Access set to Maintenance and the update Type method set to Manual.
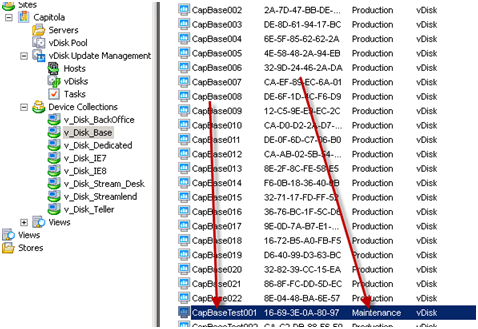
  1. On Provisioning Server console select a device to use for maintenance and put in maintenance mode,(it should also be in maintenance mode on XenDesktop console. Go to Xenserver and boot the vDisk from the Maintenance device, install or remove applications, add patches, and complete any other necessary updates, then shutdown the Maintenance device. Optionally, test that changes were made successfully.

    Note: If booting a Test or Maintenance device, a boot menu displays that allows the user to select from which vDisk, or version of that vDisk, to boot from.


Select “1″ for maintenance.
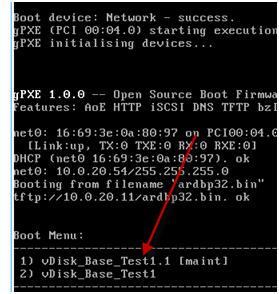
After you finish with updates shut down maintenance device

  1. In provisioning services console, right-click on the vDisk, select versions, then select the Promote… menu option from the context menu that appears.


    Then choose test or production:
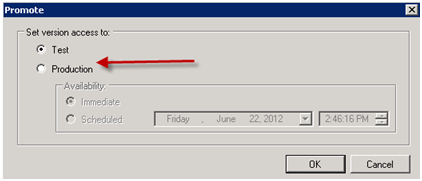
    Target devices that are set to test can access test versions of the vdisk.
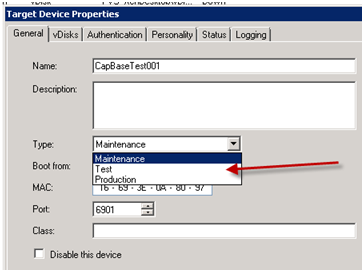
     

    Promote to production when you are ready. This ends maintenance. The next time a user logs into the desktop they will receive the latest version.


Tags: ,

How to Create a New PVS vDisk from an Existing vDisk

Procedure: how to create a new pvs vdisk from an existing

Oftentimes I find myself with the need to create a new Provisioning Server vDisk from an existing “base” image. If you have an existing image that is a good starting point for the image you wish to create, this will cut down on the effort required. The following are the steps to create a new PVS vDisk from an existing vDisk.

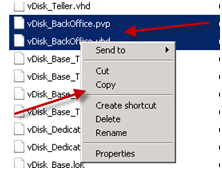
step 1: make a copy of the pvp and vhd files of the existing vdisk

Go to your Provisioning Server vDisk store and make a copy of the PVP and VHD files of the existing vDisk.

step 2: export the existing vdisk

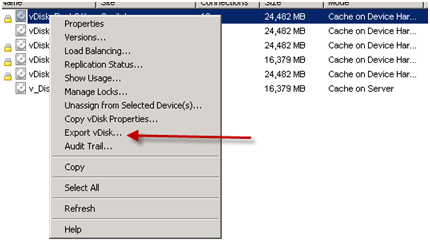
Go to the Provisioning Server Console, go to the vDisk Store and right-click the vDisk and export:

step 3: rename the xml file from the export to the new vdisk name

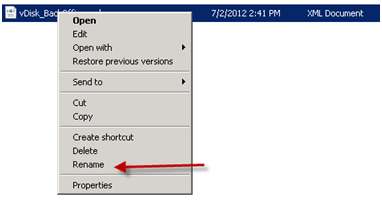
In the directory where your vDisk store is located, find the xml file which was created for the vDisk you just exported and rename to the name of the new vDisk.

step 4: rename the copied pvp and vhd files to the new vdisk name

In the directory where your vDisk store is located, find the copies of the vDisk PVP and VHD files which were made in the previous step and rename to the new vDisk name (same as in step 3).

step 5: import the new vdisk

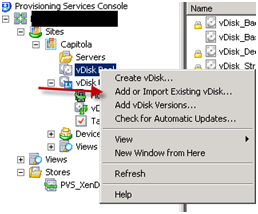
Go to the Provisioning Server console and right-click the vDisk Pool and click import:

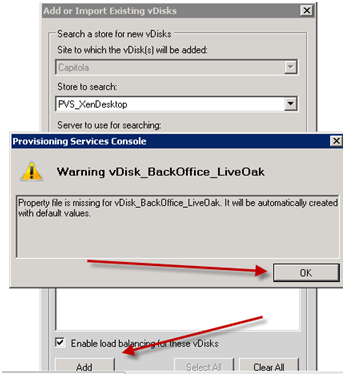
When the dialog box opens, click on “Search” and select your vDisk, the click “Add”. If the following dialog opens, click “ok”:

Your new vDisk will now be available in your vDisk store.

How to Assign a XenDesktop Virtual Desktop to a Specific Client

Procedure: how to assign a xendesktop virtual desktop to a specific client

In certain circumstances, the need may arise to assign a specific XenDesktop virtual desktop to a specific client (thin or thick). For instance, certain applications require the ability to know the location where a transaction has occurred. In most XenDesktop deployments the virtual desktops are pooled and assigned randomly to users. In this scenario the application knows only of the ip address and host name of the randomly assigned virtual desktop and not of the underlying client and therefore does not know the location. By tying the virtual desktop to the client, the location can be mapped.

There is often the requirement in a teaching lab for a group of users to be able to log on to multiple thin clients using the same login credentials. By assigning the virtual desktop to the thin (or thick) client rather than the user, this can be accomplished.

In order to assign a virtual desktop to a client in a XenDesktop/Provisioning Server environment the desktops must be part of a “private” type XenDesktop catalog.

Step 1: Create the streamed xendesktop virtual desktops via provisioning server

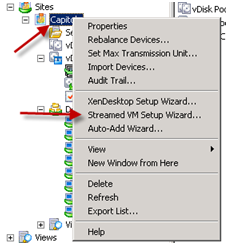
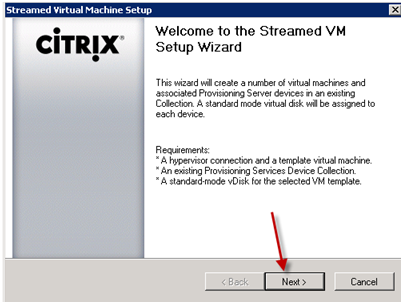
In the Provisioning Server console, right-click on the site name and select “Streamed VM Setup Wizard”.

Select next:

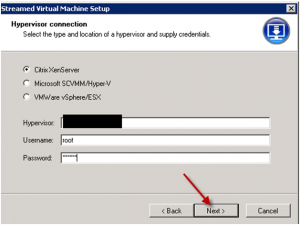
Fill in the XenServer host name and username and password and click next:

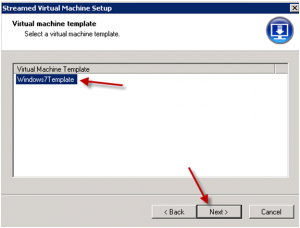
Select an existing XenServer template and select next:

Select an existing Provisioning Server collection and the corresponding vDisk:

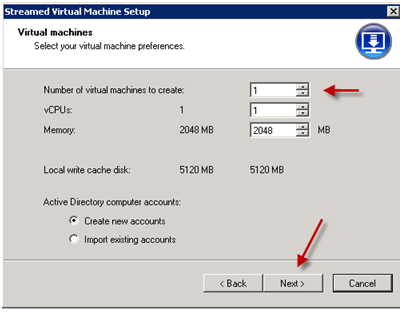
Select the number of virtual machines to create and the options:

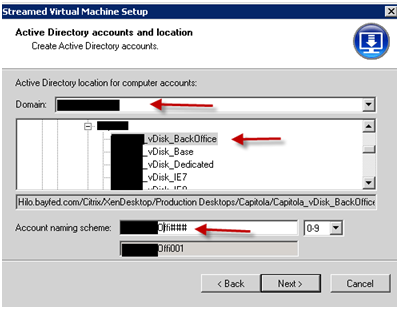
Select the Domain, OU and naming scheme for the virtual desktops:

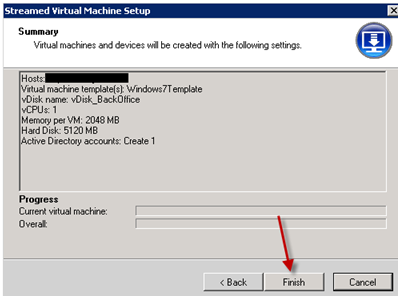
Then click next and finish:

Step 2: create a “private” type catalog in xendesktop studio

In order to assign a virtual desktop to a client in a XenDesktop/Provisioning Server environment the desktops must be part of a “private” type XenDesktop catalog.

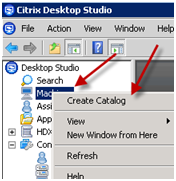
From the machines node in Desktop Studio, right-click and select “create catalog”:

The catalog type must be one that is deemed “private”. For Provisioning Server desktops you must select “existing”. For XenDesktop MCS desktops this could be “pooled static” or “dedicated”.

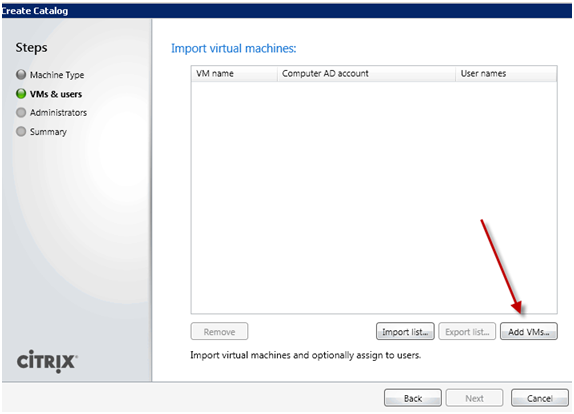
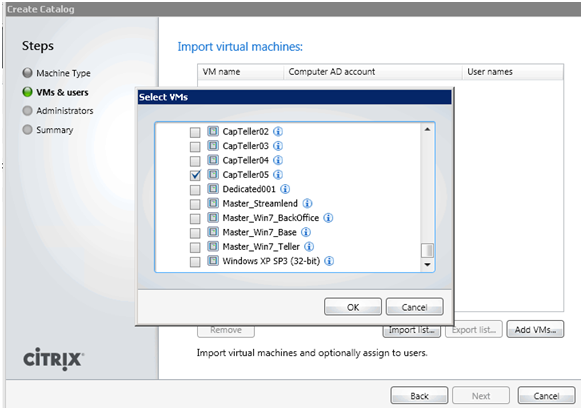
Select “add vm’s”:

Select the vm’s you created in the previous step:


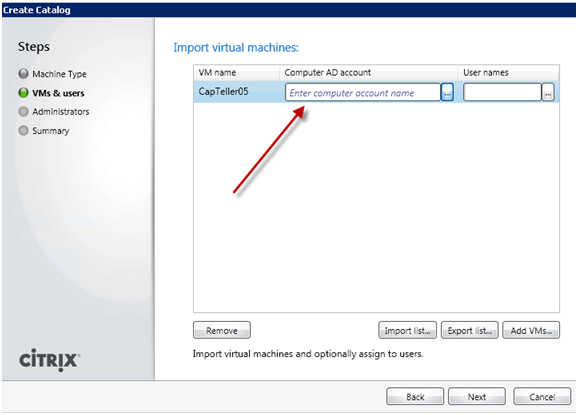
Browse Active Directory for the computer name and DO NOT put in a username:

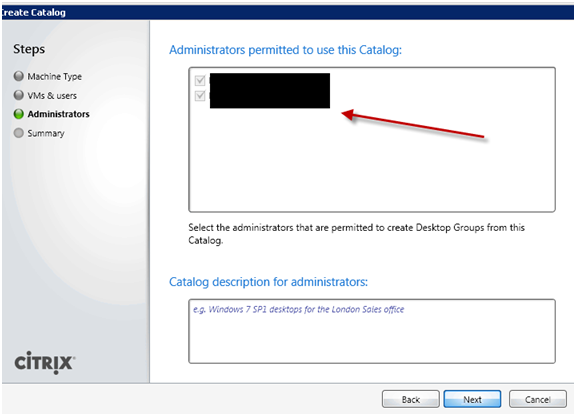
Add the administrators:

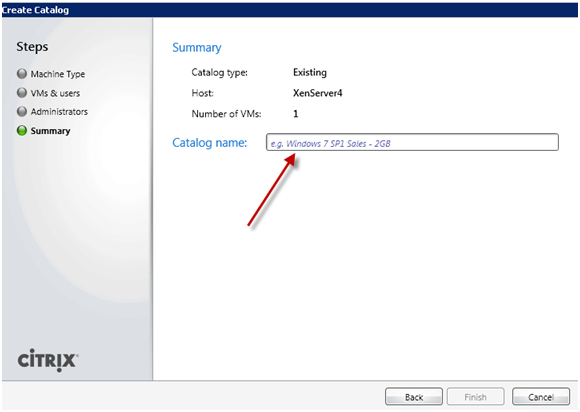
Add the catalog name and finish:

step 3: create a new desktop group and add the machines

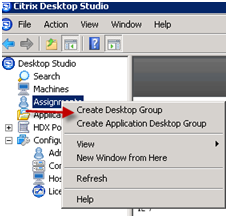
From the assignments node in Desktop Studio, right-click assignments and select “Create Desktop Group”:

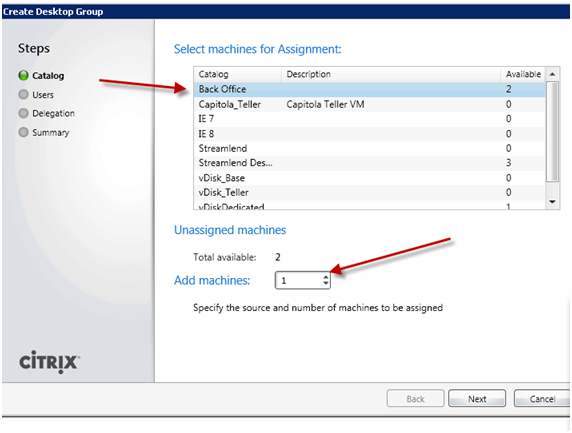
Select the catalog from the previous step and the number of machines to add to the new group:

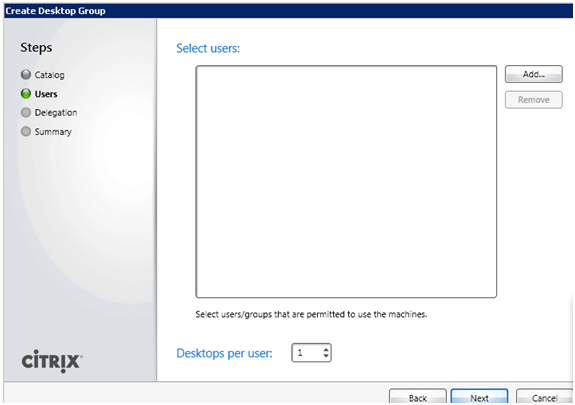
VERY IMPORTANT: DO NOT ADD ANY USERS – these desktops will be assigned to a client in the next step:


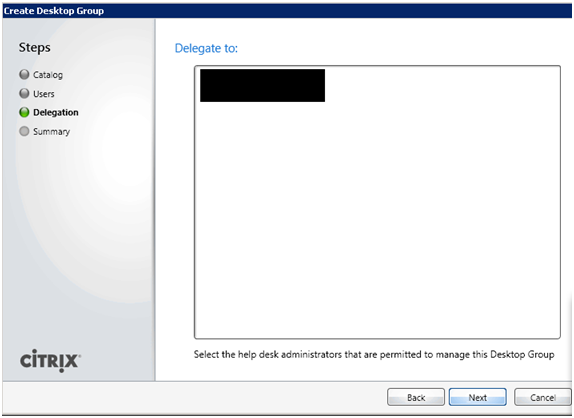
Assign the administrators and finish:

step 4: assign the virtual desktops to a client ip address

On a computer with the XenDesktop Broker SDK Snap-in registered (for example, the machine running Desktop Studio), open a PowerShell window and enter: Add-PSSnapin Citrix.Broker.Admin.*

To Assign a Desktop to a Client IP Address, run the following SDK command, providing the required desktop name and the IP address of the client device to which it is being assigned:

Set-BrokerPrivateDesktop DOMAIN\MACHINENAME -AssignedIPAddress 10.10.20.7

In the above example, anyone who logs on using the client device with IP address 10.10.20.7 now always receives the desktop named “DOMAIN\MACHINENAME”.


Tags: , ,

Hello world!

Welcome to my blog.  More to come…